How to Carve a Pumpkin with a Dremel Tool

My name is Matt Cornelius, photographer for Texarkana Magazine, and today’s Talk Tuesday Tutorial is a fun one. I am revisiting a Halloween carving video I filmed several years ago and turning it into a fresh step-by-step guide you can follow at home. This project is not a traditional carving—because instead of fighting with tiny saws, we are using a Dremel rotary tool. This method is fast, beginner-friendly, and easier than you might expect. The project I am making today is the “Halloweenie.”
Tools You Will Need
- Pumpkin carving kit with scraper, saw, and punch tool
- Small knife (to open the pumpkin)
- Dremel Micro or Dremel Lite (cordless tools are easiest to control)
- Dremel 191 High-Speed Cutter Bit (for outlining the stencil)
- Dremel 106 Engraving Burr (for fine details and tight corners)
- Dremel 9910 Tungsten Carbide Cutter (optional — for smoothing and cleanup)
- Printable pumpkin template from PumpkinLady.com
- LED tea light or similar light
- Safety glasses
- Bleach and water mixture (to preserve the pumpkin)
Step 1: Prepare the Pumpkin
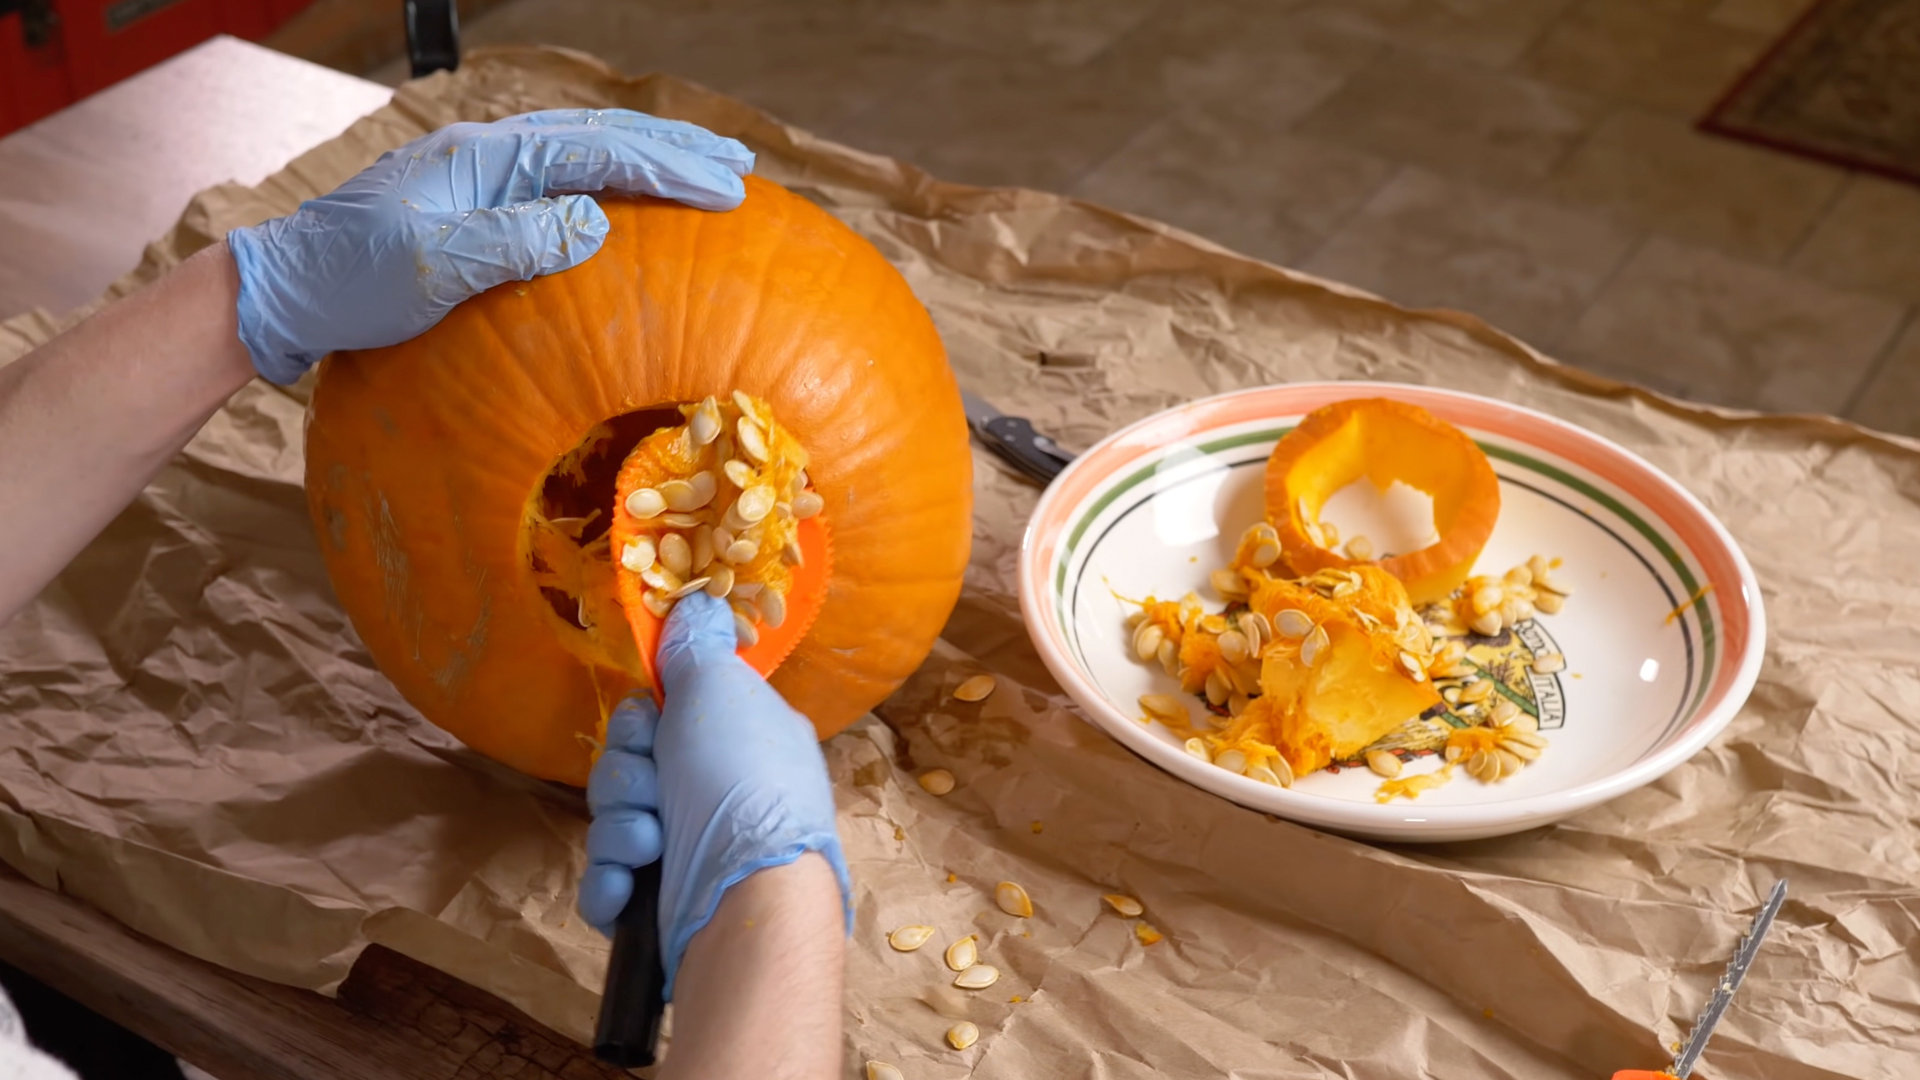
Choose a pumpkin with a smooth surface and a clear carving area. Instead of cutting the top off, cut an opening in the bottom. This keeps the stem intact and makes lighting easier later. After removing the bottom, scoop out the seeds and pulp with the scraper until the inside is clean.
Step 2: Apply and Transfer the Stencil
Print your design from PumpkinLady.com and lightly spritz the paper so it forms to the pumpkin. Trim the edges where needed, tape it in place, and use a push pin or punch tool to mark every line with tiny dots. When you remove the stencil, outline the hollow carving areas with a marker so the pattern is easy to follow.

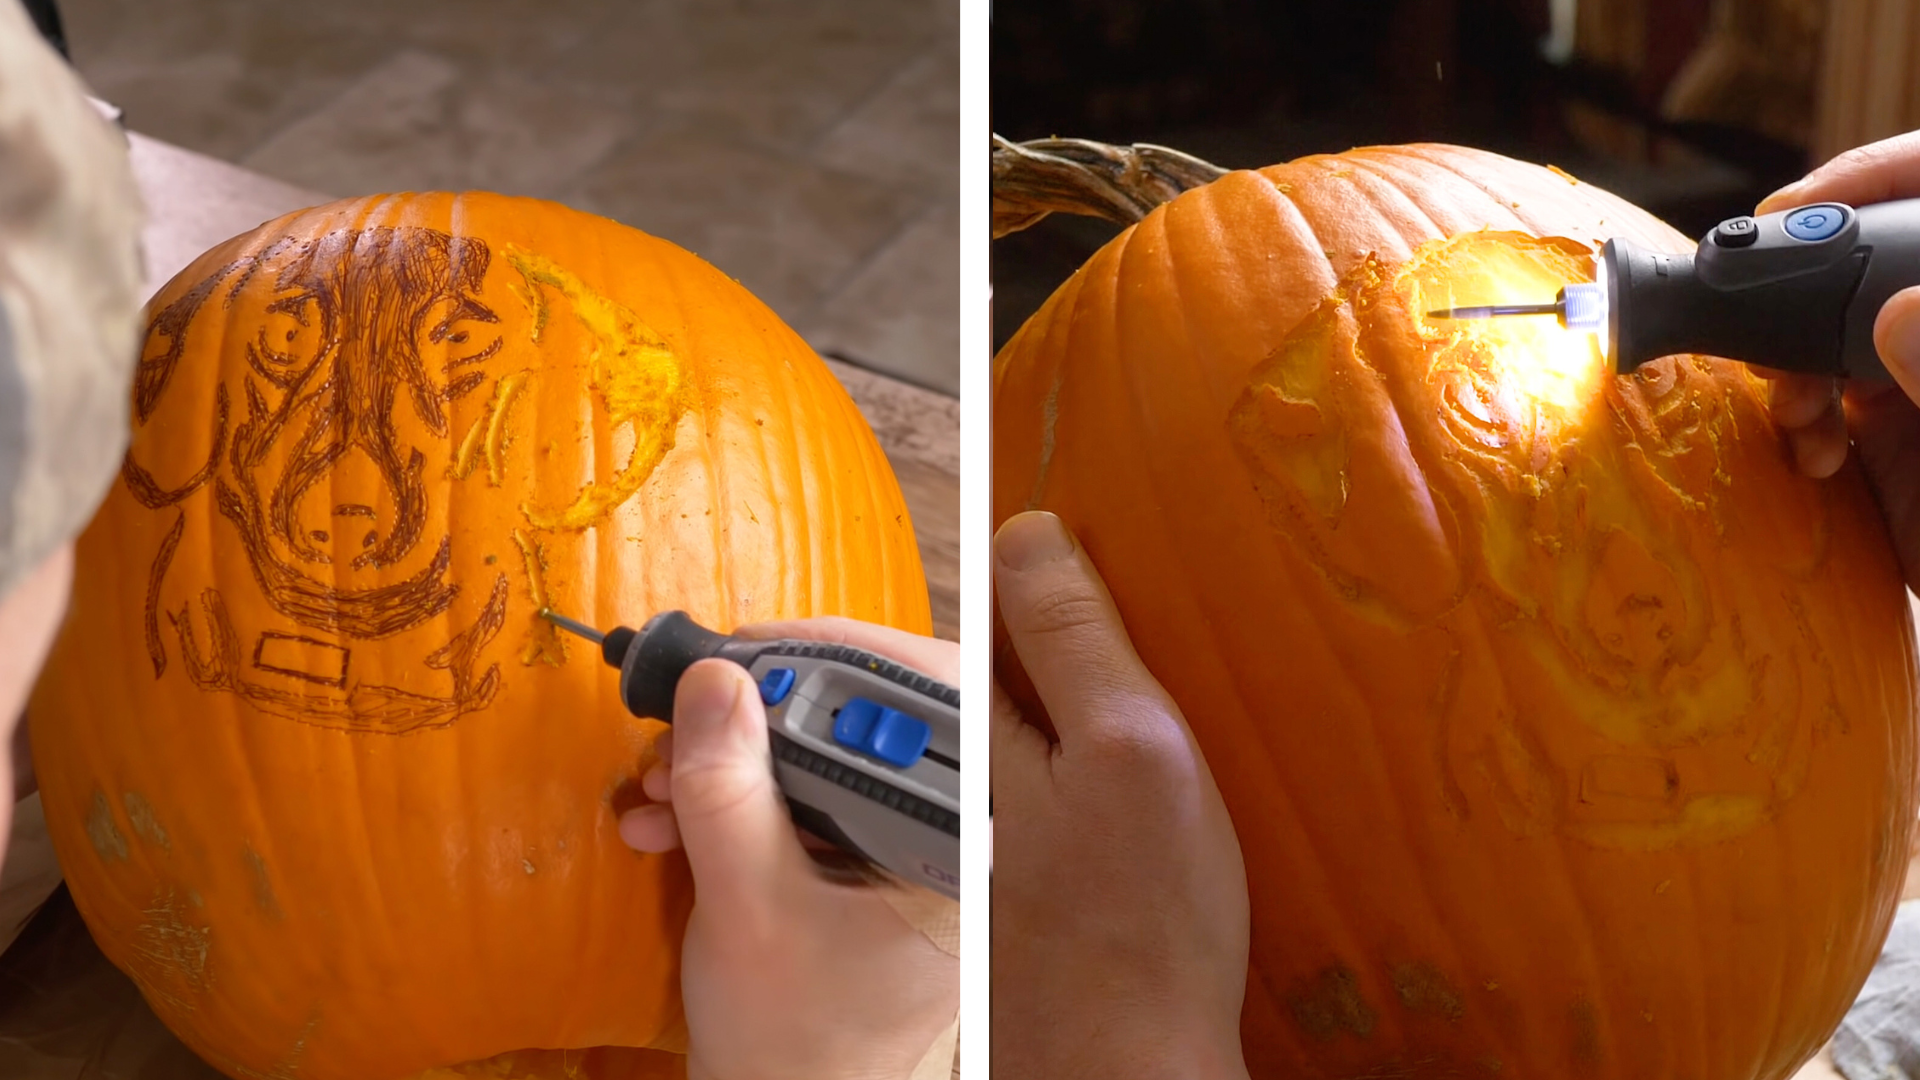
Step 3: Carve the Outline with the Dremel
Install the 191 bit, put on your safety glasses, and set the tool just under full speed. Follow your dotted lines and let the Dremel do the cutting. Slow and steady passes work best. Once the outline is finished, carve away larger sections until light can pass through the design.
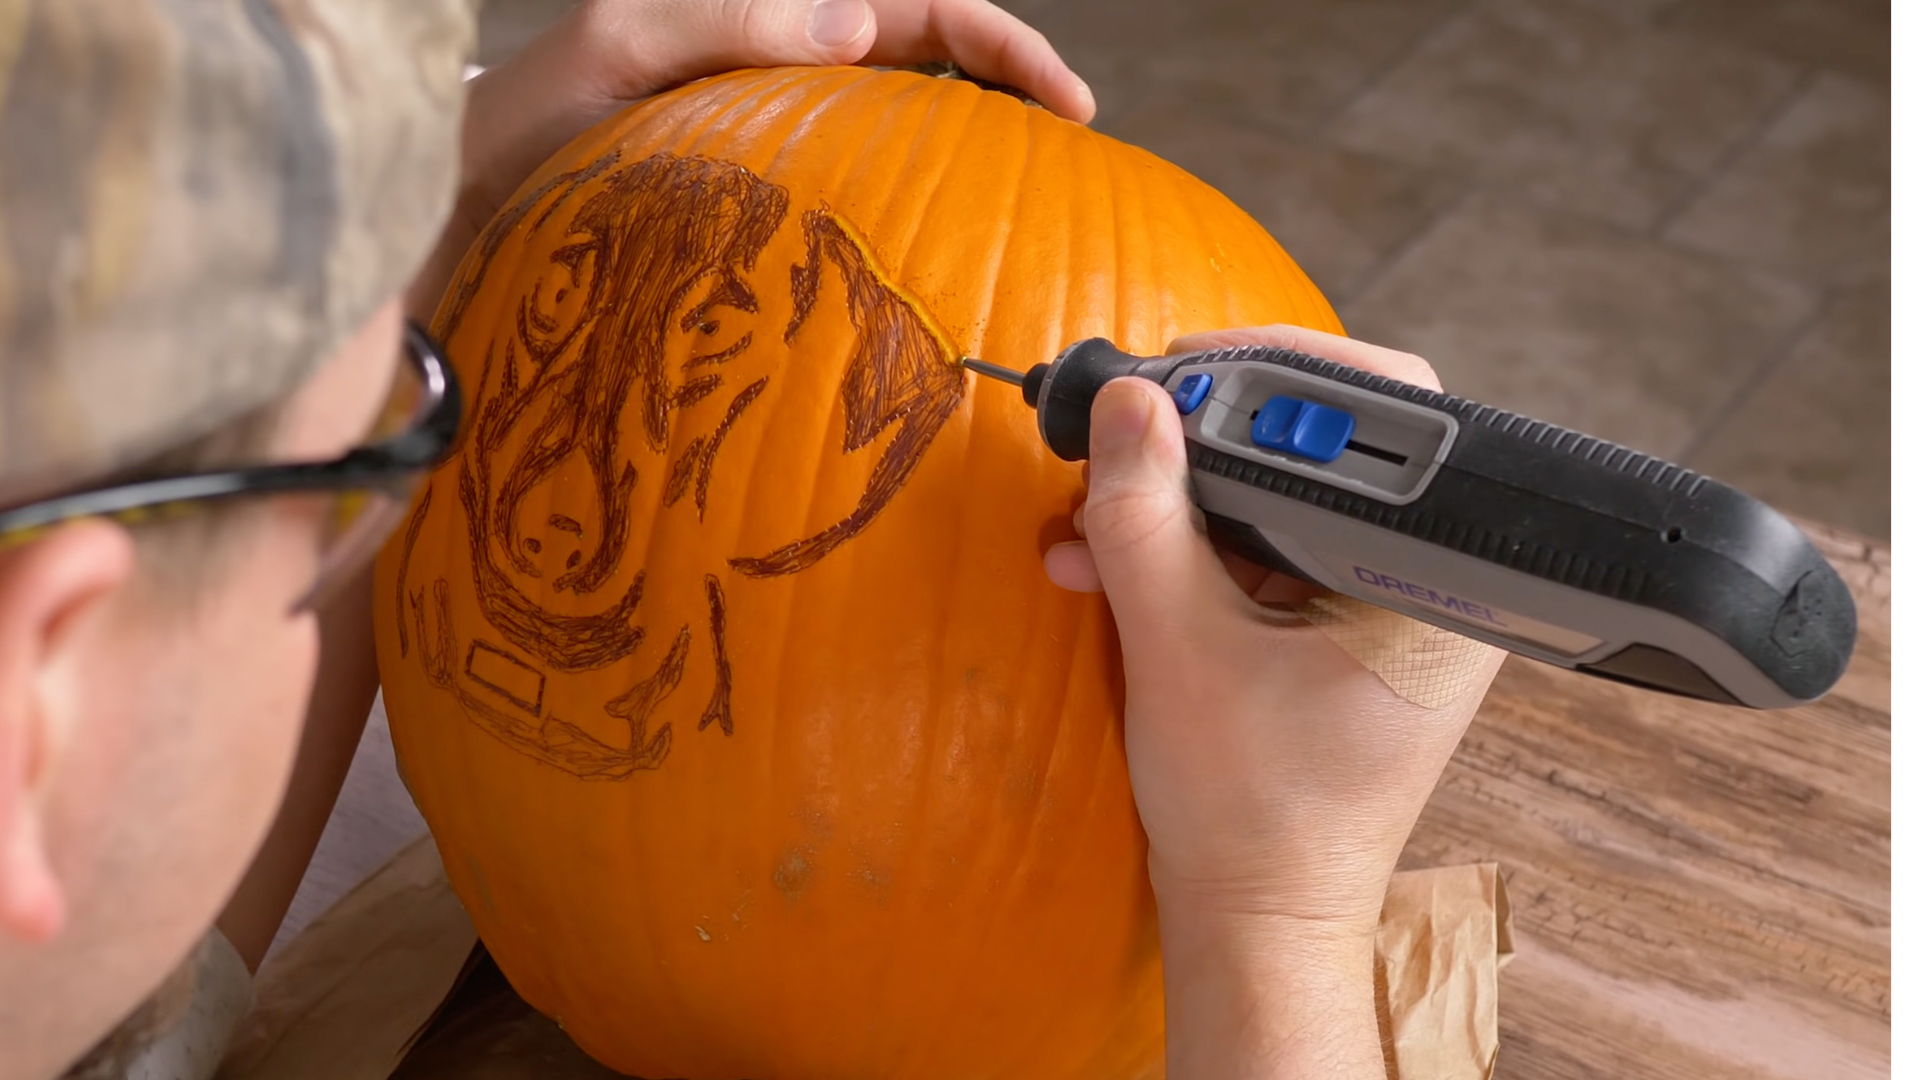
Step 4: Add the Details
Switch to the 106 burr to clean up small spaces and refine the shapes. For extra smoothing, use the 9910 cutter as an optional final pass. The smoother the surface, the better the finished glow will look.
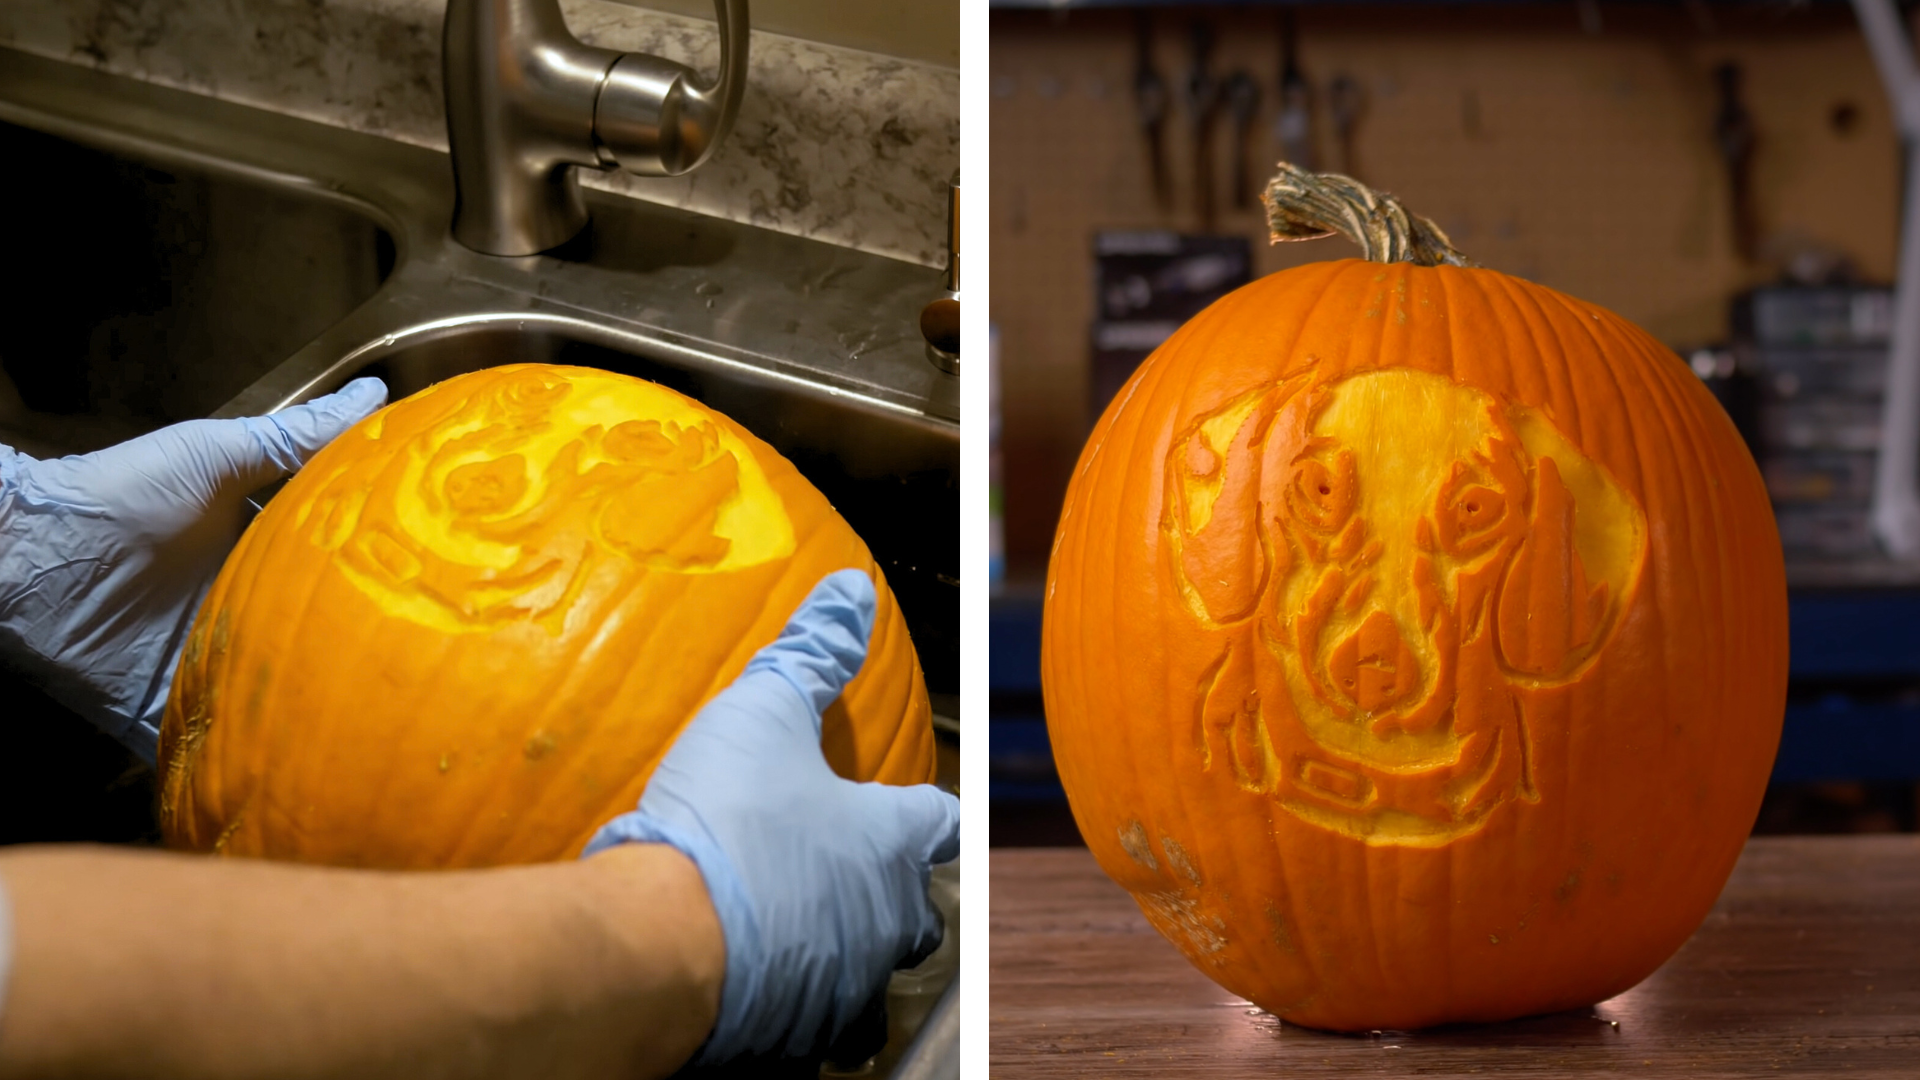
Step 5: Preserve and Light the Pumpkin
Rinse carved areas with a water bottle and wipe everything clean. Mix a small amount of bleach with water and lightly wash the inside and outside of the pumpkin. This slows mold growth and extends its life. Once it dries, place a small LED light under the pumpkin and set it back on its base for a bright, even glow without the heat of a candle.
In-Depth Video Guide
If you want to watch me carve this project step-by-step, you can see the full tutorial on my YouTube channel by CLICKING HERE.

Final Thoughts
Carving a pumpkin with a Dremel opens the door to clean lines, creative shapes, and designs that stand out on any porch. With the right bits and a simple stencil, you can turn an ordinary pumpkin into a glowing display in less time than you think.